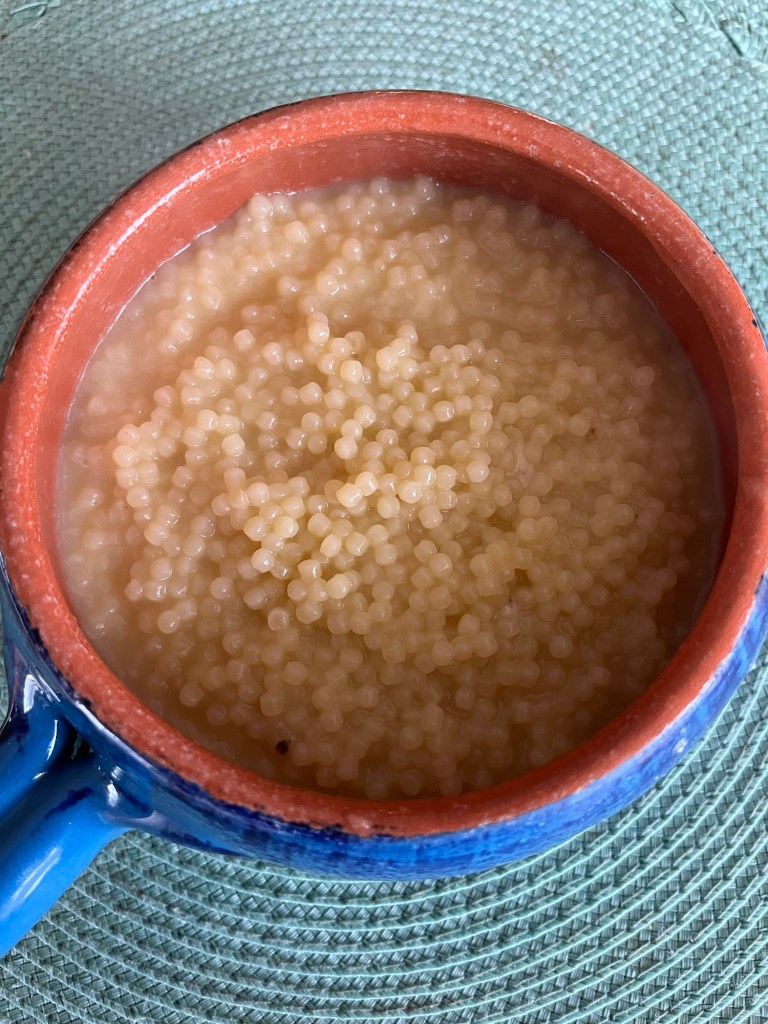
Pastina is a classic recipe for when you are feeling sick or cold. It is ideal for older people or children, as well, because it is easy to digest. It isn’t meant to be fancy or heavily seasoned. Instead, rely on the simple flavors to comfort you. It feels silly to add the recipe here because it is so simple, but I have had a few people ask me for the recipe. The beauty is that it is ready to eat in ten minutes with ingredients you usually have on hand:)
You will need:
2 cups chicken broth (bone broth preferred)
pinch of salt
3/4 to one cup of pastina (or very small pasta like orzo)
1 tbsp butter
1/4 grated Parmigiano Reggiano
Steps:
Bring the broth and salt to a rolling boil.
Add the pastina and cook for 8 minutes. Most of the liquid should be absorbed. I stir constantly because it tends to stick to the bottom as it absorbs.
Once the pastina is cooked, stir in the butter and the freshly grated parmesan cheese. Make sure the parmesan is good quality. Sometimes, if I feel fancy I might put a scrunch of black pepper.
Sprinkle some extra grated parmesan on top, and enjoy.
This is a very simple recipe that my mother used to make for us. I am quite sure she got it from Betty Crocker or some other 70’s icon of baking. What is important is that of all the desserts we ever ate this was my favorite. As I have written before, we didn’t eat a lot of sweets or have dessert frequently. I suppose that is why I loved this one so much. My mom generally made it during the fall in the afternoon, so it would be waiting for us when we got off the bus from school. Because it was always a surprise and also because of the thrill of something sweet in the middle of the day, I was filled with joy when I would walk through the home and smell the aroma. It made me feel very loved, and to this day, it transports me back to a simpler time. I associate it with fall, corduroy, bell-bottoms, leaves, and chilly nights.
Some people top these with a cinnamon-sugar crumble or a glaze, but I prefer to serve them the way my mom did-with a simple dusting of vanilla-infused powdered sugar.
I make it for my children the same way – always for after school and never with advance notice. But I am not sure if they love it as much as I do.
You will need:
1cup, all purpose flour
1tsp baking powder
1⁄4 tsp salt
1tsp cinnamon
1 pinch nutmeg
1⁄4 cup melted unsalted butter
1⁄2 brown sugar, packed
1⁄2 cup white sugar
1 large egg
2 tsp vanilla
2 small apples, peeled and chopped
Steps:
set oven to 350 degrees and grease a 9 x 9-inch baking dish with butter or shortening.
In a bowl mix together flour, baking powder, salt, cinnamon & nutmeg.
In a large bowl mix together melted butter with 1/2 cup brown sugar and 1/2 cup white sugar, egg and vanilla until smooth and well combined.
Blend in the flour mixture and mix until just combined. Gently stir in chopped apples.
Spread the mixture into prepared baking dish. Bake for 25-30 minutes or until it tests done.
Cool in the pan, then cut into squares and dust with powdered sugar.
This cake is a source of joy in the summertime. It is fresh, light, airy and delicious. We make it towards the end of spring and during the summer as long as strawberries are fresh and in season. It remains a classic summer favorite in our house. It is essentially a simple cake with fresh whipped cream and strawberries and it tastes like summer. Be sure to keep the cake cook in the refrigerator to preserve the whipped cream and eat it the same day. I cannot imagine that you have leftovers, but it is definitely best eaten fresh.
Ingredients
Cake Ingredients:
1/2 cup (1 stick) unsalted butter, room temperature, plus more for pan
1 1/2 cups all-purpose flour (spooned and leveled), plus more for pan
2 teaspoons baking powder
1/2 teaspoon salt
1/2 cup sugar
2 large eggs plus 2 large egg yolks
1/2 teaspoon pure vanilla extract
1/2 cup whole milk
Filling and Topping Ingredients:
1 pound strawberries, hulled and thinly sliced
1/2 cup sugar
1 1/2 cups heavy cream
Directions
Step 1 – Preheat oven to 350 degrees. Butter and flour the bottom of a 8 inch cake pan and sides. In a medium bowl, whisk together flour, baking powder, and salt; set aside.
Step 2– Using an electric mixer on high speed, cream butter and 1/2 cup sugar in a large bowl until light and fluffy. Add eggs and yolks, one at a time, beating well after each addition. Beat in vanilla. With mixer on low, alternately add flour mixture in 3 parts and milk in 2, beginning and ending with flour mixture; mix just until combined. Spread batter in prepared pan.
Step 3 – Bake until a toothpick inserted in center of cake comes out clean, 30 to 35 minutes. Cool in pan 10 minutes; invert onto a wire rack to cool completely. Using a serrated knife, split cake in half horizontally; place bottom half, cut side up, on a serving plate.
Step 4 – To make the filling : In a large bowl, combine strawberries and 1/4 cup sugar; set aside.
Step 5 – To make the topping – Using an electric mixer, beat cream and remaining 1/4 cup sugar in a large bowl until very soft peaks form.
Step 6 – Arrange half of strawberries over bottom cake layer; top with half of whipped cream, leaving a 1-inch border. Cover with top half of cake, cut side down. Top cake with remaining whipped cream, leaving a 1-inch border. Refrigerate cake and remaining strawberries separately, at least 1 hour (or up to 1 day). Just before serving, spoon strawberries over cake.
Here is an alternate to the classic Almond Biscotti that is sweet and decadent. Before the purists chase me down, I know this isn’t canon, but it is great regardless. The brown sugar makes this texture a bit softer than a classic almond biscotti. If you do not have Grand Marnier, feel free to substitute with a dash of orange juice.
Time:3 hours (including chilling & cooling). Actual assembly time is around 30 minutes.
Yield:3 dozen
You will need:
1 cup brown sugar
2 3/4 cups all purpose flour
1 1/2 tsp baking powder
1/4 tsp salt
1 cup slivered almonds, unsalted & lightly toasted
2 tbs orange zest (two small oranges or 1 large)
1 stick of unsalted butter, melted
3 large eggs
3 tbs Grand Marnier
1 tsp vanilla extract
Dark Chocolate chips (Milk chocolate is also fine)
Step one:
Preheat oven to 350 degrees.
Layer almonds on a sheet pan and toast for 3-5 minutes. Check the almonds every minute to ensure they do not become overcooked – the color should be very light brown. Cool.
Step two:
Blend melted butter, sugar, Grand Marnier, and vanilla extract in a large bowl.
Add eggs.
Stir in flour, baking powder, and salt until just combined.
Stir in almonds.
Step three:
Chill the dough for 30 minutes to ensure that it is easier to work with.
Step four:
Wet your hands (this makes shaping easier) and halve the chilled dough and form 2 loaves on an ungreased large baking sheet.
Bake until pale golden, about 30 minutes.
Allow the loaves to cool for five minutes on the baking sheet.
Remove the loaves (I use a pizza spatula) and cool on a wire rack for and additional 15 minutes.
Cut the loaves with a serrated bread knife.
Step five:
Place biscotti (cut-side down) on a clean baking sheet and bake another 15-20 minutes. The color should be light golden.
Cool the biscotti on a wire rack.
Step six:
Melt chocolate chips and either drizzle over the cooled cookies or press cookies on one side into the chocolate.
Cool and refrigerate to set. Store in an airtight container when done.
Limoncello is a delicious way to end a big meal. Meant to be drunk in very small quantities after your meal, it supposedly settles your stomach, but that of course is up for debate. It makes a wonderful holiday present and is very simple to make. The trick is being attentive enough to swirl you peels for 20 days and using alcohol with as high a content as possible. In the United States, this would most likely be grain alcohol. Using this means the limoncello won’t freeze when you store it. But for those of you who can’t get grain alcohol, use vodka instead. It will be slightly less potent and will freeze when you store it. Just set it out on the counter for a half and hour before you plan to consume it. Always be sure to store limoncello in the freezer, because it is best consumed very, very cold.
For limoncello, you will need 10 organic lemons and grain alcohol (ex: everclear). Having several large mason jars is also a must, as well as some santized bottles to pour the mixture into.
Ingredients:
10 organic lemons, cleaned
One liter of grain alcohol or vodka
1 Mason jar, sanitized
3-4 santized bottles for storage
Sugar (3 and 1/2 cups) or Honey (1 and 1/2 cups)
Steps:
Clean your lemons to make sure your peels don’t have any additivies or dirt.
Next, Peel your lemons with a peeler being careful to avoid getting too much of the white on the rind.
Place the lemon peels in a mason jar. Cover the lemon peels in the alcohol leaving a little room at the top. Store the lemon peels in a cool, dark place, such as a cupboard. Shake or swirl the peels every day for 20 days and put the jar back in the cupboard.
After 20 days, boil 6 cups of water in a large sauce pot. Add 3 and 1/2 cups of sugar (or 1 and 1/2 cups of honey).
After the water cools, strain the mason jar above the pan so that the liquid is added to the sugar water, but the peels are strained. You can add a little water to the rinds to get the rest of the alcohol out. I push them down with a wooden spoon to get every drop.
Add your limoncello to sanitized bottles. Leave a little room at the top, especially if using vodka because it will freeze and expand.
I love making these and the best part about these is that you don’t have to knead it. These are incredibly versatile – you can use it as a pizza base, or add vegetables to make it Catalan style or Roman flatbread. You can make it as a base for antipasti or pesto-prosciutto. I have used these several ways: to make individual pizzas for children, or to make my own inventions. I usually whip these up on a Friday night after school and work for a very low effort-delicious alternative to pizza. I would let the children each have their own flatbread to decorate as they wish. These are also a savvy appetizer item for company. The recipe is rather simple, and there are endless ways to showcase ingredients.
Prep: 10 minutes
Time to Rise: 45-60 minutes
You will need:
2 cups all-purpose flour
1 package active dry yeast
1 tsp sugar
1/2 tsp kosher salt
1 Tbs olive oil
2/3 cup warm water
Steps:
Coat a medium bowl with olive oil. Combine flour, yeast, sugar and salt. Add olive oil and water until dough forms.
Shape into a smooth ball and roll around to coat it in oil. Cover bowl with plastic wrap and let it rise in a warm place for 45-60 minutes until double in size.
Preheat oven to 450 degrees. Lightly grease a baking sheet with olive oil or spray and sprinkly with cornmeal. On a lightly floured surface, roll and strech dough until it is your desired size. Transfer dough to the baking sheet and lightly brush with olive oil. Bake 12- 15 minutes until golden brown.
Top with desired toppings and serve.
Easy Flatbread Ideas:
Roman style – olive oil, arugula, fresh grated parmesan cheese, dash of salt
Lately, I have been flagging recipes I like from Instagram and saving them to try later. I have been especially interested in weeknight meals rather than a Sunday show stopper. This sauce was definitely easy and worth the time. You could make it vegetarian or add some sausage or chicken to it, rather easily. I chose to slice up some Sundried tomato chicken sausage in a pan and add it to the pasta for a simple, fast meal. Here, you let the oven do all of the work, which frees you up to put together the rest of the ingredients. The roasting in the oven paired with fresh basil created a lot of flavor in a short amount of time. This recipe has been replicated over several sites. The only difference here is the addition of a little red pepper to balance the sweetness of the ricotta and roasted tomatoes. This took under 30 minutes to put together and was very easy.
You will need:
1 lb of roma or campari tomatoes, quartered
1 head of garlic with the root end sliced off
Olive oil, as needed (several glugs)
salt & pepper to taste
1/2 tsp of red pepper flakes (optional)
6-7 leaves of fresh basil
1/4 cup of ricotta
Pasta of your choice- spaghetti, bucatini, busiati or penne
Steps:
Preheat oven to 375
Put tomatoes and garlic in a pyrex or casserole dish. Add salt, pepper and red pepper. Roast for 15 minutes.
While tomatoes are roasting, begin to boil pot of water for your pasta. Add salt to the pasta water.
When tomatoes are finished, add them to a blender. Squeeze garlic from the bulb, and and add that as well. Add basil and ricotta and blend until smooth.
Add the tomato sauce to a sauce pan over medium-low heat.
When pasta is finished (al dente), strain and add it to the sauce pan to finish off.
Work in reserve pasta water and some cheese (parmesan or romano) until creamy. Serve and enjoy.
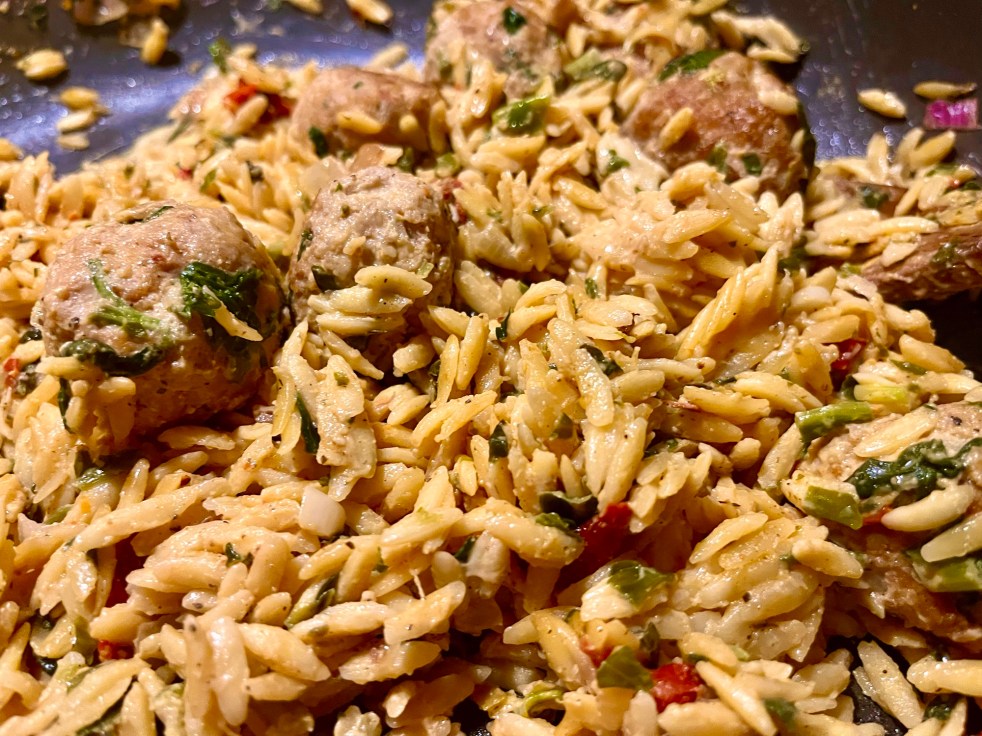
This is a 100 percent comfort recipe and is part of the series of my finding solid weeknight one-pan recipes to enjoy after a long workday. There are many shortcuts you can take with the this recipe – using premade meatballs or switching meatballs for another leftover protein (shredded chicken, sausage), or if you prefer to make it all homeade, you can do that, as well.
This pasta sauce would work with many types of proteins (shrimp, chicken, beef, pork sausage). I opted for chicken meatballs because I wanted meatballs, but lighter. I also added mint and parlsey, rather than just basil because I think it is a good combination and I already had it on hand. Also, I like to use red chili flakes in sundried tomato sauces for additional flavor.
Another practical aspect of a one-pot meal, is that you can add other vegetables into the dish. I always like to sneak in as many vegetables as possible when cooking for my family. In this particular instance, I took some frozen spinach, patted it dry, and stirred into the sauce for an additional source of nutrition.
You will need:
Ingredients for the meatballs
1 pounds ground chicken
½ tsp salt
½ tsp black pepper
½ tsp sweet paprika
2 cloves minced garlic
1/4 cup minced onion
1/4 breadcrumbs, italian style
1 egg
2-3 tbsp chopped basil leaves (5 leaves), 1 tbs chopped mint (3-4 leaves),* 1 tbs chopped italian parsley*
1-2 tbsp olive oil for cooking
1 tbsp unsalted butter for cooking
Ingredients for sauce and orzo
4 garlic cloves minced
1 shallot finely chopped
16 oz dry orzo pasta
1 tsp salt
1 tsp black pepper
1 tsp dried oregano
1 tsp dried red chili flakes
2 tbsp tomato paste
2 ½ cups low sodium chicken broth
1 cup heavy cream
½ cup chopped sun-dried tomatoes
2 tbsp chopped basil
1 tbsp lemon juice
1/2 cup grated Parmesan
Steps:
Combine all the ingredients for the meatballs in a large bowl. Mix until just combined, using your hands. Roll the meat into 2 tablespoon-sized balls. It makes for about 18 meatballs.
Heat oil and butter over medium in a large skillet or pot. Add meatballs and brown all over. Remove from skillet. They don’t need to be cooked through because they will finish cooking when returned to the sauce.
Add a little more olive oil to the pan if needed. Add shallot and garlic, cook for until fragrant (2-3 minutes). Add orzo and toast for 2 minutes while stirring. Stir in salt, peppers, oregano and tomato paste and mix it together.
Pour in chicken broth and bring to a boil. Once boiling, reduce to a simmer, reduce the heat to low. Cook uncovered while stirring occasionally to keep the orzo from sticking, until almost al dente and almost all of the liquid is absorbed, about 10 minutes.
Add cream, sun-dried tomatoes and basil. Add lemon juice and stir in Parmesan. Return meatballs to the skillet, cover and simmer for 5 minutes or until the meatballs are cooked through.
Tiramisu is my favorite dessert of all time. I like to have it for my birthday every year and usually like to bring it to holiday parties for others to enjoy. This recipe is not mine – it is one I really enjoy and use over and over again and so I would like to share it with you. Normally, I like to adapt or change things around, but this one is perfect, as is. Ideally, let this chill for 48 hours to allow the flavors to fully develop. I tend to make this 2 days in advance. Source: Gina Petitti.
Total time: 1.5 hours (preparation & chilling)
Ingredients
6 extra large Eggs, room temperature
1 cup Sugar
4 Tbsp Kahlua, divided
2 lbs Mascarpone Cheese
1 cup Heavy Cream
2 ½ cups Espresso
½ cup Brown Sugar
2 Tbsp Cocoa Powder
1 package Lady Finger Cookies (2 if you want to make extra)
Extra sifted Cocoa Powder for topping the dessert
Steps for making the cream:
Use a bain marie on your stove or use a sauce pan filled halfway with water, heat to a low, gentle boil.
Using a pyrex bowl – Beat eggs and 1 cup of sugar for 2 minutes until fluffy.
Move the bowl of eggs and sugar over the saucepan. Reduce the heat to a simmer. Continue to beat the eggs until foamy for 5-6 minutes.
Remove the eggs from the heat and beat for another 6 minutes until the texture and color is a bit more of a custard.
Add 2 Tbs of kahlua and mascarpone into the egg mixture and beat for another 2-3 minutes.
In a separate bowl, beat heavy cream until there are stiff peaks. Gently fold the whipped cream into the egg mixture so you do not knock the air out. Cover with saran wrap and chill for an hour.
Steps for assembling the tiramisu:
While the cream mixture is chilling, brew the espresso.
Add 2 tbs of kahlua, 2 tbs of cocoa and brown sugar to the coffee mixture. Blend with a whisk and allow it to cool down.
Using a 13 x 9 baking dish, dunk ladyfingers in the coffee mixture. Be quick because they will crumble if they get too wet. I usually turn in over just once on each side and shake the extra off. Assemble in the dish. If you need to cut the edges of a few cookies to make it fit, that is absolutely fine. I try my best to maximize the space.
Spoon some of the whipped cream onto the layer of the cookies and spread around.
Complete another layer of ladyfingers (I lay them the opposite way of the first layer) and then cream. Dust with cocoa powder and chill. Ideally, you should allow 48 hours before serving.
Note: This recipe usually makes extra, so I often assemble another 9 inch pan and make a smaller cake to give away or enjoy at home.
I have three top cookies during the holidays – I know many people love sugar cookies and buckeyes and all other sorts of favorites, but these three are the ones I think about once the holiday season: Almond Cresents, amarett, and ricotta cookies. Ricottas are my absolute favorites to eat in large quantities and I always look for them in bakeries.
These are so creamy and delicious that I prefer these over your standard sugar cookies during the holidays, if I am honest. They are very cakey and soft, which I love. The good news is that they are rather easy to make. You can enjoy during the holidays, or anytime of the year. This recipe is an adaptation from the New York Times.
Time: 1 hour, plus 2 hours’ chilling
You will need:
2 sticks (1 cup) plus 1 tablespoon unsalted butter, softened
2 cups sugar
15 ounces ricotta cheese
Finely grated zest of ½ lemon
4 teaspoons vanilla extract, divided
2 large eggs
4 cups all-purpose flour
2 tsp baking soda
¾ teaspoon salt
For Icing:
4 cups confectioners’ sugar
2 tbs fresh lemon juice
1/2 tsp almond extract
1/2 cup or more of milk, as needed
Steps:
Using a mixer, cream 2 sticks butter with sugar until fluffy, about 2 minutes.
Add ricotta, lemon zest and 2½ tsp vanilla and beat well. Beat in the eggs one at a time. Scrape the sides of the bowl down with a rubber spatula, then beat in flour, baking soda and salt. Cover dough and chill for at least 2 hours.
Heat oven to 350 degrees and line several cookie sheets with parchment paper or nonstick liners. Shape tablespoons of dough into balls. Place 2 inches apart on baking sheets and bake until pale golden on the bottom, about 15 minutes. Let cool on wire racks.
Melt remaining tablespoon butter. Whisk confectioners’ sugar to break up any large lumps, then whisk in melted butter, lemon juice, remaining 1½ teaspoons vanilla, almond exract and enough milk to make a spreadable icing. Spread icing on cooled cookies, then let set for at least 20 minutes before serving.
*If you want to use sprinkles, make sure to do them immediately after the icing, because it sets rather quickly.